by Jason Whong
I'm a firm believer that mere use of a Mac doesn't make someone a media master, just as driving a sporty car doesn't make someone a racer. Tools don't make a pro, it's the use of those tools. (Just ask Andrew about my lack of page layout skills...)
While some things are taught in books and classes, you're going to learn the basics of nonlinear video editing right here from your web browser. Some people pay tons of money for this at a technical school.
If you put the shots in the order you'd like to play them back, you've got the sequencing right. But how do you get from one shot to another?
For starters, you can just stick the beginning of one shot right onto the end of a previous shot. This common technique is called "cutting". This is the least intrusive, easiest to follow method of going from one shot to another in the same context.
Other transitions include the dissolve and the wipe, which are both used primarily to denote a change in context (location, time, or whatever). Wipes involve mixing the screen area of one shot on top of another. Dissolves make one shot almost appear through another, gradually.
With that in mind, let's consider the first few minutes of a popular TV show. One of the new Star Trek series, I suppose.
A scene begins with a computer-animated spaceship moving slowly through space, and some music. Then there's a cut to a long shot of the inside of the bridge, and the captain is in his (or her, depending on which Star Trek show we're talking about) chair. Other crew members are visible in the foreground and background. Cut to a closeup of the Captain as he (or she) says "Red Alert!" Finally, there's a cut to the same long shot that we just saw, and people are scrambling to battle stations.
From this rough example, we learn that wider shots are often used to establish context, and tighter shots are used to emphasize detail. If you'd never watched Star Trek before, and the first thing the Director showed you was someone calling "Red Alert!", would you even know they're on a spaceship?
Taking it one step further, The Director not only used one shot to establish that the show trakes place on a spaceship, he also used a second shot to establish that the scene takes place on the bridge of the spaceship. Afterward, when the Captain called for Red Alert, the camera was mostly on the captain. Finally, we saw the result with a long shot, as the crew raced to their posts.
This is just a brief example of how different shots can be used together to communicate ideas and concepts. The rules are the same even with nontraditional video sources, like clips you've captured with Snapz Pro 2.
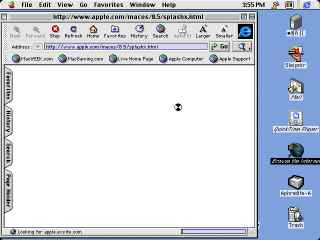
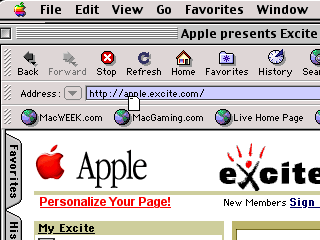
Let's say you're teaching someone to go to a website by typing in a URL at the top of a browser. This can be accomplished using separate recordings in Snapz Pro. As in the Star Trek example, we'll use multiple shots to establish context, and communicate the details and results.


This part is tricky - you must keep the same aspect ratio (ratio of horizontal to vertical pixels) and same recording size. Our last recording was scaled to 1/2 of the full resolution, so we must make this recording match.
Set Snapz Pro 2 to scale its recording to 100%, but tell it to capture only a selection. Then, manipulate the selection rectangle so that it is 320 pixels across by 240 up and down. Then, move that rectangle to the place where you type the url.
Start recording. Type the url. Stop recording.
If you've got the Pro version of MoviePlayer, you've got all the tools you need. Open the first clip with MoviePlayer. Then, pause the movie at the point you think would make a good time to insert the other picture. Then open the second video and paste it in at that point.
Now the new clip has a long establishing shot, a close up on the words as they're being typed, and a long shot of the words as they're being typed, and the result. Select the second instance of typing by holding down the shift key and dragging the progress indicator, then hit the delete key.
You should now have a concise video clip like the one below:
If you find a jumpcut, go back and record your second shot again until you've got enough footage to assure a smooth edit. sometimes leaving a bit of space on the front and end of each clip gives you more to work with when you're editing.